

-
All-Treat 3-Way Mix
Regular price From $5.99 CADRegular price -
Root Rescue - Transplanter for Life!
Regular price From $15.99 CADRegular price
Proper Materials Required
Once your boots get dirty you will not want to run back in for scissors.
- 3-Way Mix Soil
- Root Rescue
- Sharp Spade Shovel
- Watering Can or Mixing Bucket
- Scissors or Prunners
- Measuring Tape
- Wheel Barrow Or Tarp to Protect Grass
- Staking Aids if Required
Potted Trees Vs Ball & Burlap
We Sell Trees That Are Grown In Two Different Ways
- Pot Grown - These plants have been growing directly in a pot for quite some time now. Their roots have not been disrupted or pruned to fit in the pot, alternatively, they have grown into the pot. There should ONLY be soil in the pot. You will not find any burlap or twine holding it together.
- Ball & Burlap (B&B) - B&B Trees have been grown in a field. Upon us ordering them, our growers carefully dig them up, pack their rootball tight with soil and wrap it into a ball with burlap and twine to protect the roots during transportation. Sometimes growers will place smaller B&B trees in pots to help protect the roots better. If you ever see twin in your pot follow B&B instructions.
It is important to know which type you are transplanting. You will not have success if you plant a B&B tree like a pot grown tree. Making this mistake will result in a void warranty. If you have any questions and need clarification please call us 519-352-1127.
Digging The Hole & Placement
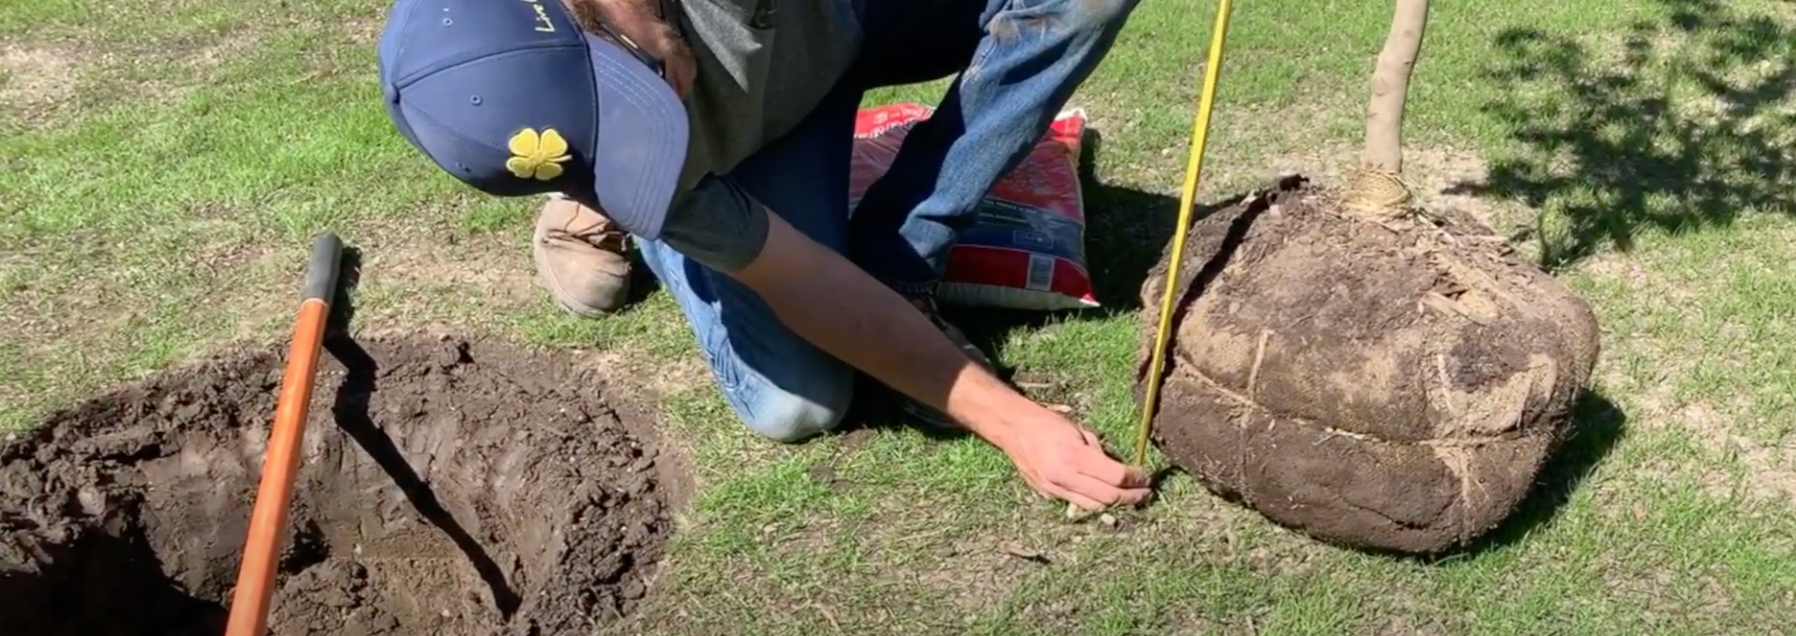
PAUSE *** Do not physically use the root ball to test the size of the hole. Use a measuring tape. Why?
It is very important to protect the roots from as much damage as possible. Every time you pick it up and put it down the roots are essentially experiencing a mini earthquake. Using any other precise form of measurement to determine the hole size is better for the plant. Our instructions will tell you when and how to safely remove the pot or burlap. Please refrain from jumping ahead.
1. Start with measuring the depth and width of your root ball.
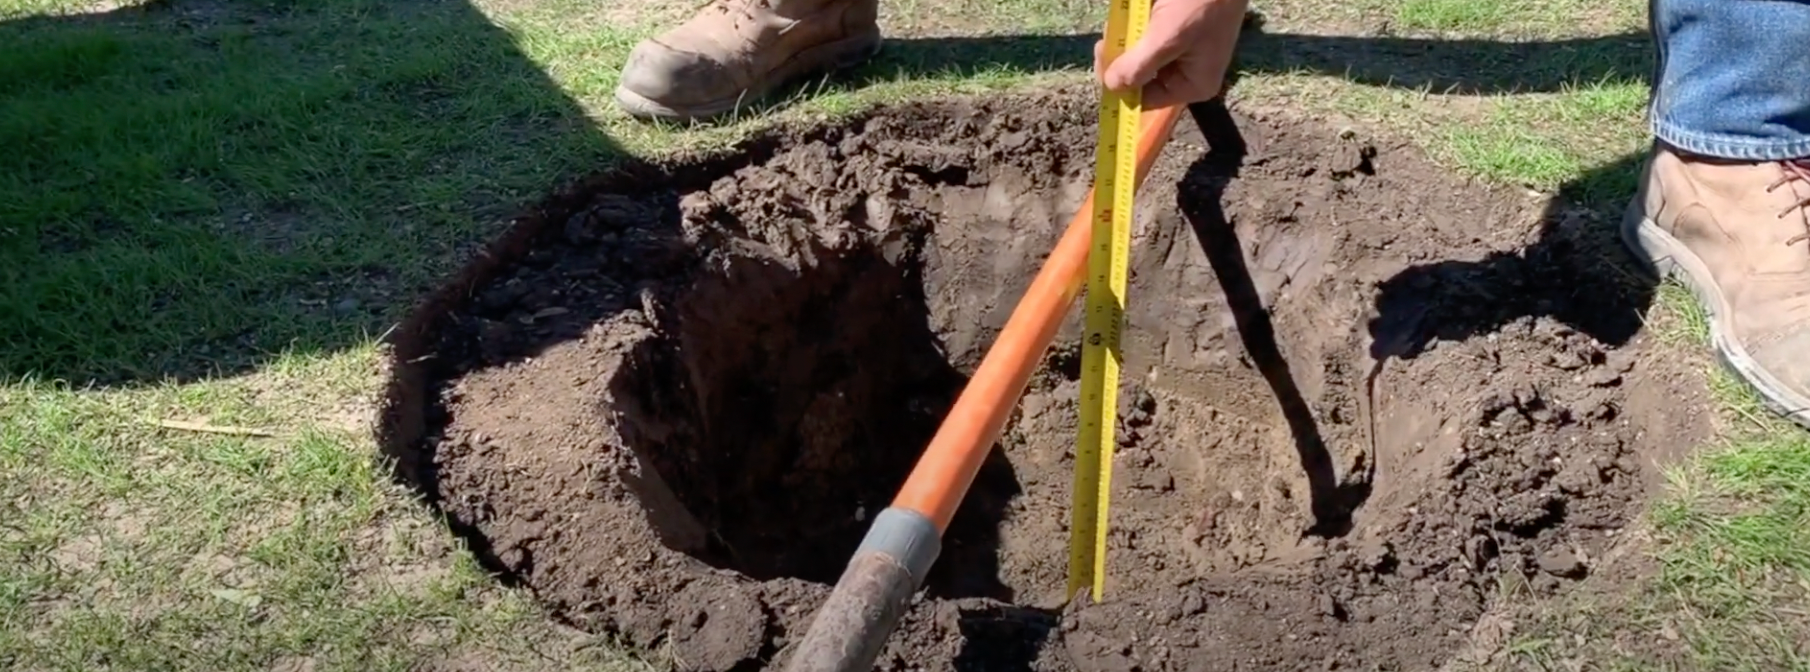
The diameter of your hole should 1.5x wider than root ball but NO DEEPER than the height of the plant's original soil level. When you reach the bottom of the new hole, do not break up the soil at the bottom. In theory you may assume it will help the roots penetrate deeper, but as the soil settles your plant may sink, inviting rot at the trunk.
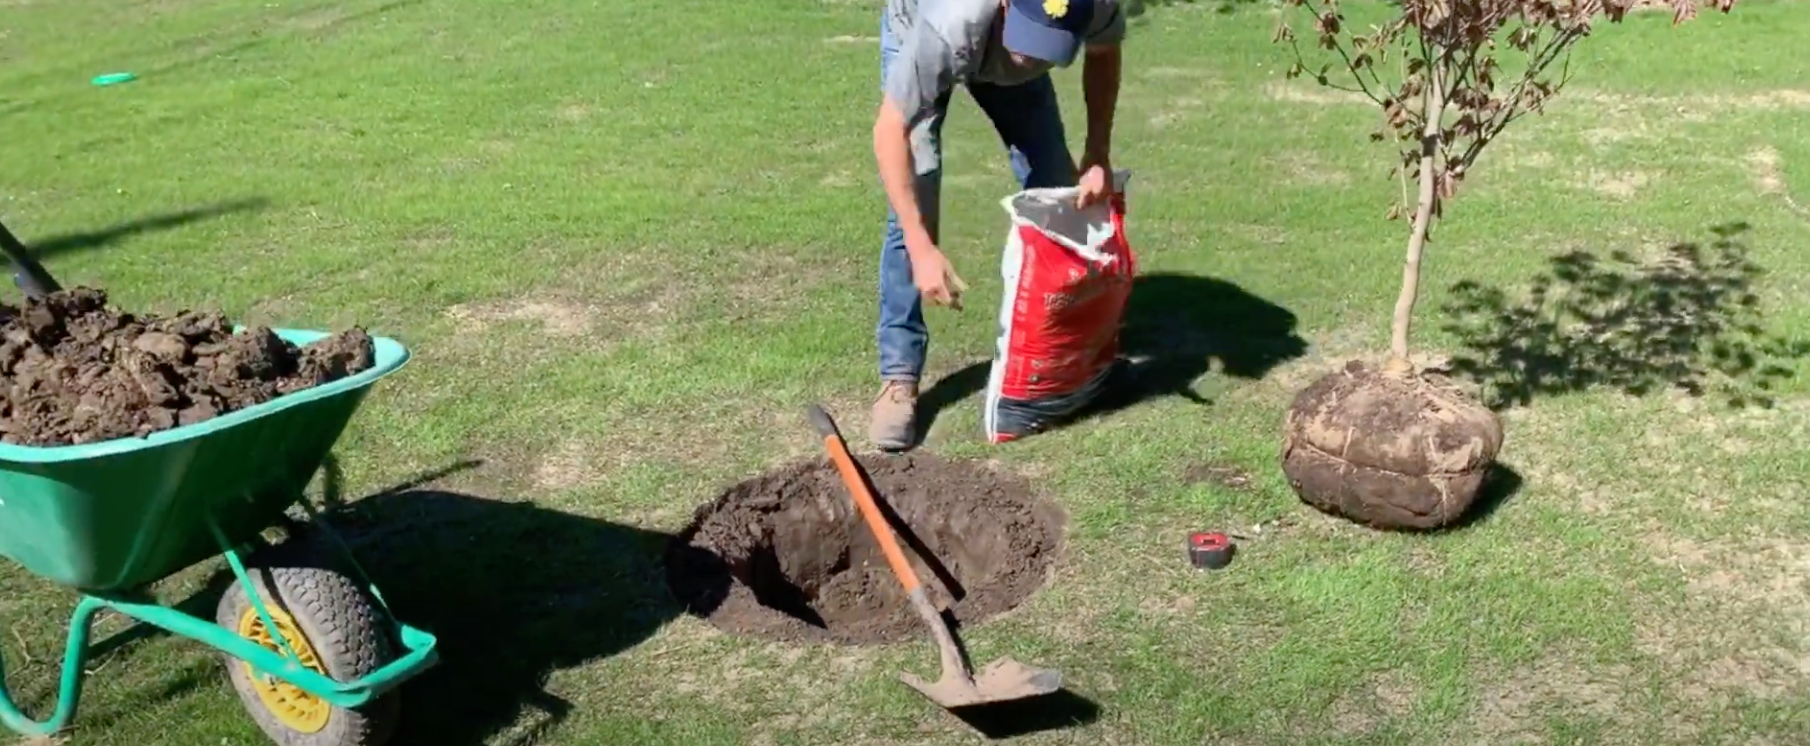
2. Combine 3-Way Mix Into Backfill Soil
3-Way Mix is recommended to use when backfilling your hole. It amends the soil by adding rich nutrients and making it more inviting for the new growth has an easier time getting established.
As you dig the soil out of your hole, keep 1/2 of it. Break up any large chucks and mix in equal parts 3-Way Mix.
Once you are done digging the hole to the size of your initial measurements, use your measuring tape (NOT the actual plant) to double check the depth. The depth of the hole should be the same height as the level of soil in the pot.

3. Correct Any Measurements Before Moving On
If the hole is slightly too deep, backfill and pack it down well so that it doesn't settle over time. Make sure you have the proper depth before moving on.
Do You Struggle With Digging Holes?
- Wet earth is easier to break up than dry. Water the area well an hour or two before digging.
- A heavy shovel is actually easier to use in the end. Using the weight of the shovel to help you dig can make your efforts more impactful.
- Don't just use your arms. Get your whole body into it. Steel toe shoes allow you to use the full strength of your legs without hurting your feet. If you have them use them!
Backfilling & Removing Burlap & Twine
This Is Where Planting Instructions For B&B & Pot Grown Trees Differ
*Please Follow Instructions Carefully

Pot Grown
Gently Remove Your Plant From The Pot
Lay your plant down on its side gently, supporting it so the branches don't break.
If the pot doesn't slide off easily slightly press down on all four sides of the pot while gently rolling it back and forth. Never pull it by the step or step on the pot to get the pot loose. This could cause damage to the root ball. Remember to be very gentle.
Begin to backfill the hole 1/2 way
Use the amended soil that you mixed in the wheelbarrow. Pause when you get half way.
Follow directions on Root Rescue Package
Water in 1/2 of the recommended amount. This will aid in packing down the soil and reducing any air pockets in the soil around the roots. Once the water is absorbed continue to back fill. Pack soil tightly. You can use your heel to help but avoid stepping on any part of the roots, you could severely damage them.
Ball & Burlap

*DO NOT REMOVE ANY PORTION OF THE BURLAP OR TWINE BEFORE IT IS BACK FILLED 1/4 OF THE WAY.
The burlap and twine keeps the soil in tack around the roots until the last possible moment
Place root ball in hole and ensure it is standing straight. Always move by lifting the rootball gently.
Begin to backfill the hole 1/2 of the way.
Use the amended soil that you mixed in the wheelbarrow. Pack it in tightly to ensure it remains straight and stable during the next step.
Remove all of the twine from around the top 1/2 of the rootball.
Be diligent in removing all of the strings, especially ones hidden around the trunk. One tight string of twine left behind will cause damage in the future. As the trunk grows it will become strangled and this prevents nutrient and water absorption, eventually killing the tree.
This type of damage can be avoided by following our instructions and therefore would void warranty if done improperly.

Use your scissors to remove the burlap from only the top 1/2 of the root ball. It is very important to remove all burlap from around the trunk and the top portion of the root ball however, also removing it from below the rootball can cause unnecessary harm. The remaining portion on the bottom will bio-degrade over time.
Once burlap and twine is removed follow directions on Root Rescue Package and water in 1/2 of the recommended amount. This will aid in packing down the soil and reducing any air pockets in the soil around the roots. Once the water is absorbed continue to back fill. Pack soil tightly. You can use your heel to help pack it in but ALWAYS remember to be careful, you could damage the roots severely by stepping directly on the rootball.
The trunk of your tree or shrub must NEVER be buried deeper than the original rootball soil level.
Our warranty does not cover rot due to improper planting depth. If you are concerned that your rootball may settle, burying it deeper over time, keep the root ball 1-2" above the soil level to allow some settling to occur.
Watering
Keep in mind that your roots will experience some level of transplant shock for the first 1-2 years after planting. It takes a while for the roots to become established enough for it to be able to support itself and acquire the water it needs without your help.
How Often?
- 1-2 weeks after planting, water daily.
- 3-12 weeks after planting, water every 2 to 3 days.
- After 12 weeks, water weekly until roots are established.
How Much?
The amount of water your new plants need will all depend on location and how well your soil drains. Start with our suggestions but adapt with more if you notice it continues to dry out before the next scheduled watering.
Potted Flowering Shrubs, Ornamental Evergreens, Perennials:
Start with 1/2 of the volume of the original pot it came in.
Caliper Trees
| Caliper of Tree Trunk | Root Establishment Time | Gallons of Water At Each Irrigation |
| 1 Inch | 1.5 Years | 5 - 6 Liters |
| 2 Inches | 3 Years | 10 Liters |
| 3 Inches | 4.5 Years | 15 - 20 Liters |
Can't Find The Time To Water?
Watering is a MUST to get your plants established. Set up a soaker hose. They are very affordable and it will save you so much time by allowing you to multi-task while you're watering your new plantings.
Prevent water run off by creating a narrow 3" raised berm with soil, around the perimeter of the hole, away from the trunk, to help retain the water.
Top it off with a 4" layer of mulch to complete the planting - this helps to prevent evaporating and helps to incubate the roots. Warmer roots in the spring means quicker growth.
Fertilizing & Root Rescue
Root Rescue & Fertilizer
Aside from using proper planting techniques, Root Rescue is one of our top recommendations for reducing transplant shock! Please Click Here for More Information on Root Rescue.
When using Root Rescue, you should not fertilize for the first 2-3 months. Root Rescue is a fungi that naturally grows in a symbiotic relationship with your plants helping their roots absorb more nutrients for life.
Once the fungi have established you can begin to fertilize with Root booster or bone meal to help with root development for the first few growing seasons.
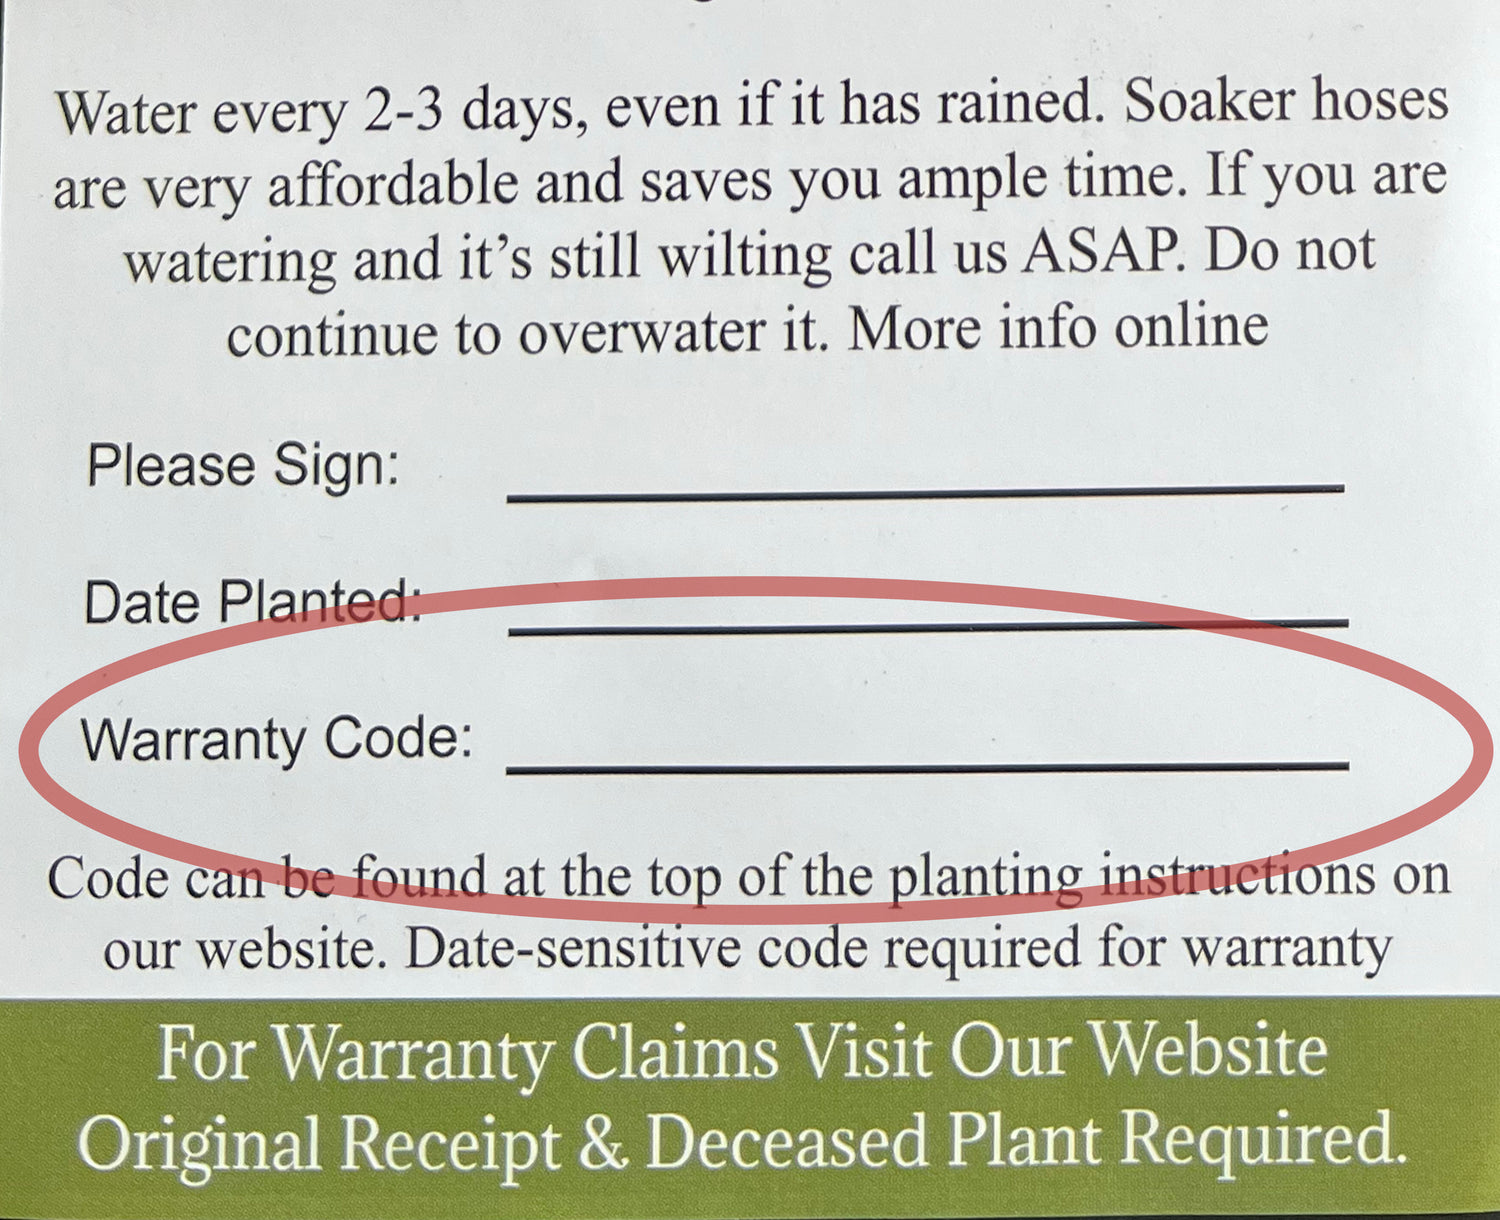
Warranty Claims